Camper Remodel
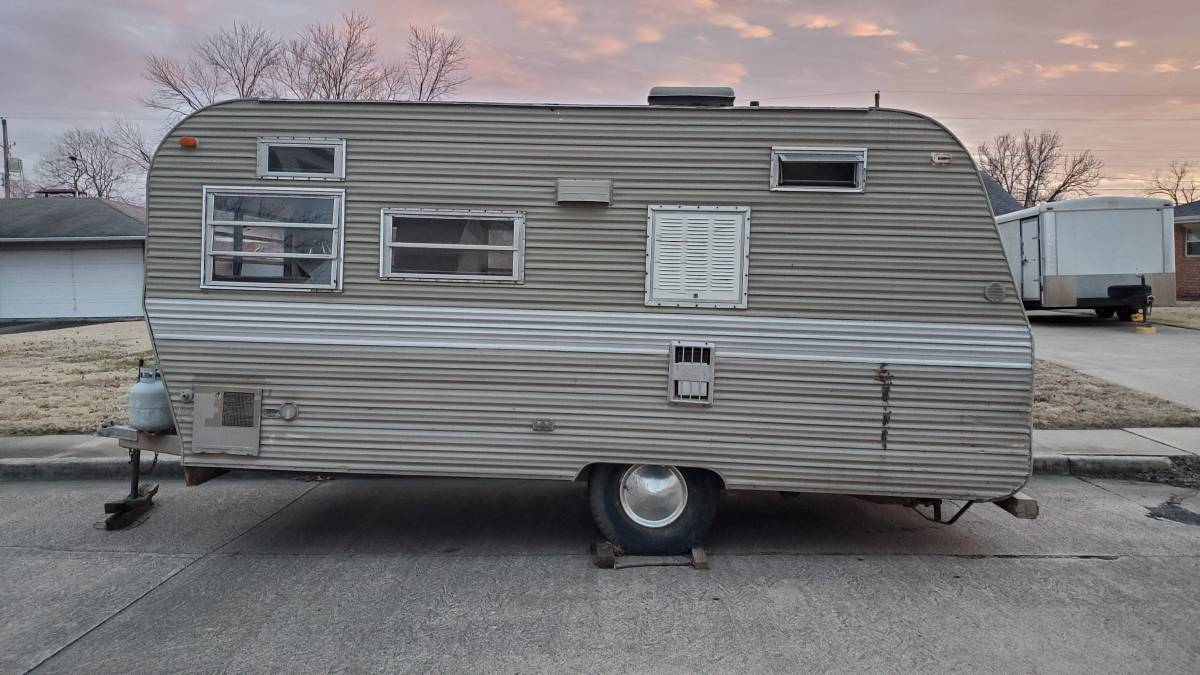
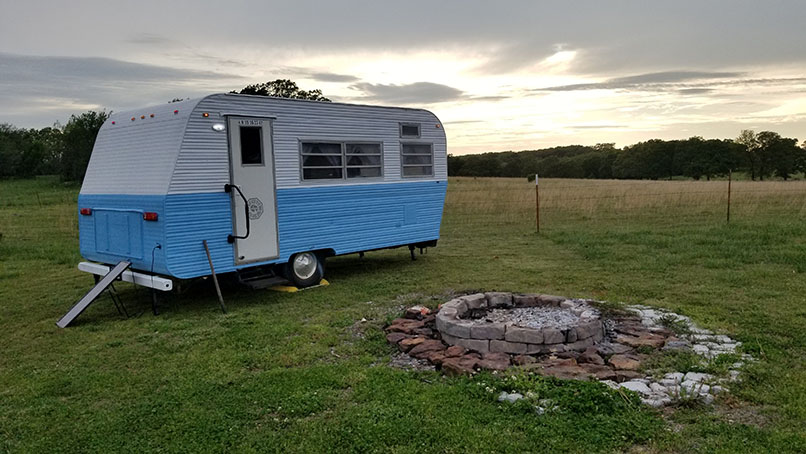 Purchased an old beat-up camper back in January to fix up. This is a 1972 Twilight Bungalow, 16ft in length. Had to end up pretty much gutting the entire thing (everything but the kitchen sink... and stove), and replacing the floor and walls. Also ran brand new wiring for a new 12 volt system utilizing a solar panel setup. This project took a little over 3 months, with a lot of blood, sweat, and tears (tears of frustration, yeesh), but we now have a decent-looking and more functional camper.
1972 Twilight Bungalow. Pictures from the Facebook Marketplace Ad, it doesn't look too bad, just needs a bit of cleanup, right?
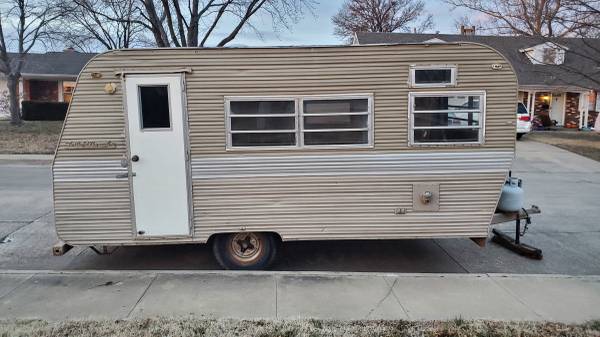
Nothing a coat or two of paint won't fix, right?

Oh, the rear hatch door is a little worse-for-wear, and it'll need some new tail lights...
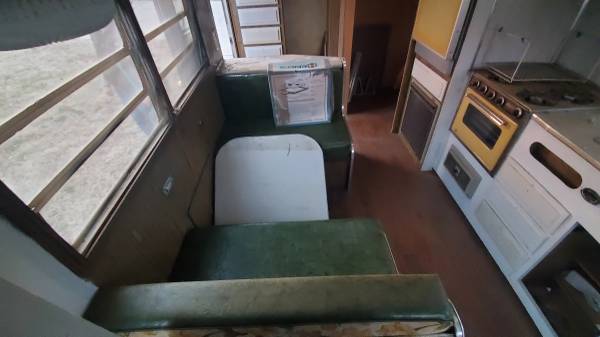
Inside isn't too bad, just has a coat of dust on just about everything...
Need to finish painting where the previous owners left off
Overall, it looks to be in decent shape. We'll take it!
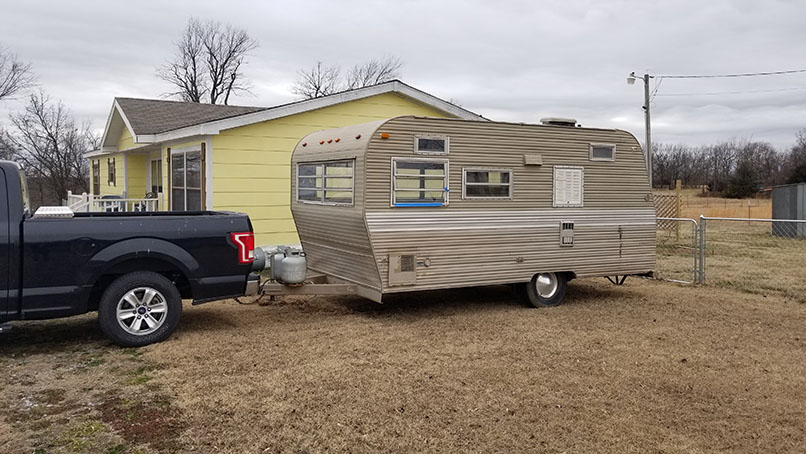
Got it home from Broken Arrow, which was about an hour drive or so. A bit of a stressful trip, as the camper wasn't hooked up to the truck electrics at all, so there were no brake lights or turn signals or anything (or brakes, for that matter). But we got it home, safe and sound.

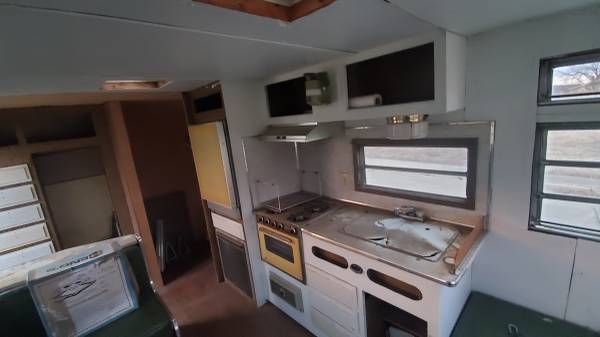
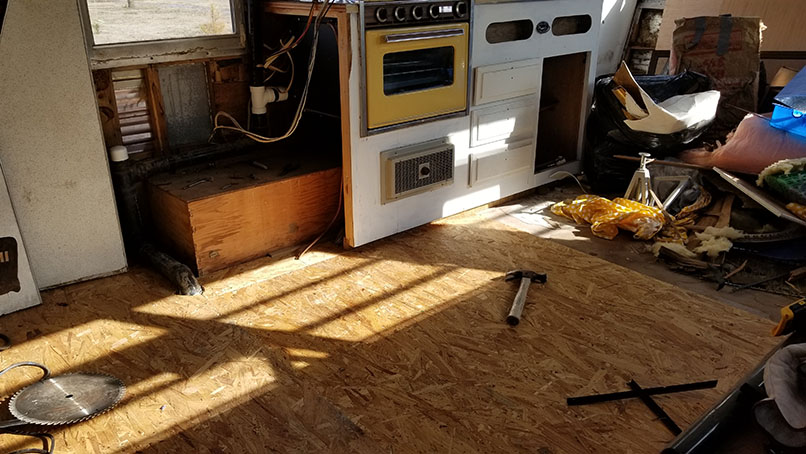
Propane lines and stove work, that's good

No need for the propane refrigerator, let's take that out.
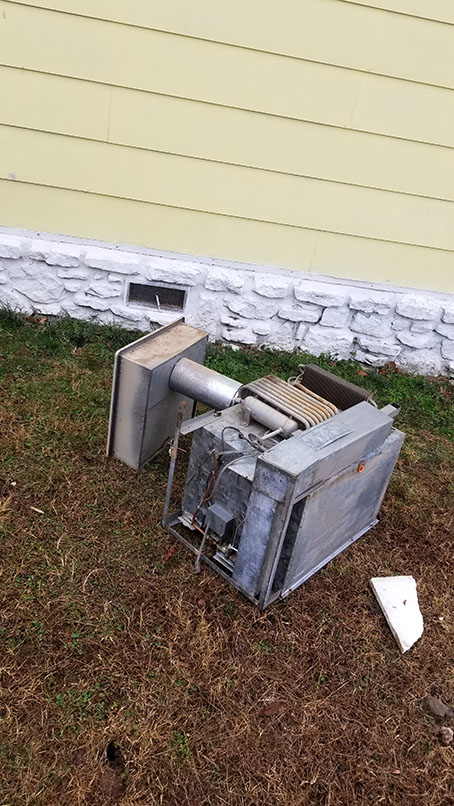
Not sure how it worked off of propane, but in any case, it's out.

LET THE REMODEL BEGIN. REMOVE THE UNNECESSARY STUFF, AS WELL AS ALL OF THE ORIGINAL WIRING. WE'RE GOING SOLAR, BABY!
Tore out the bench/bed area there in the front
And the dining table/booth too.
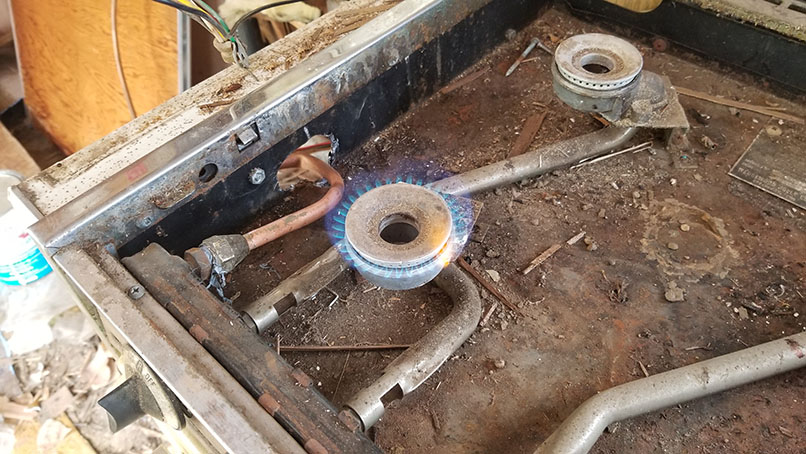
Had to reroute the propane lines, as they went through the refrigerator guts first, then to the stove. But I got it in place with minimal bending of the copper pipe, and no kinks! Hooray!

The plumbing works, that's good
Now for the roof; looks like the previous owners removed the bathroom area, and left the vent pipe for the shower and toilet in place.
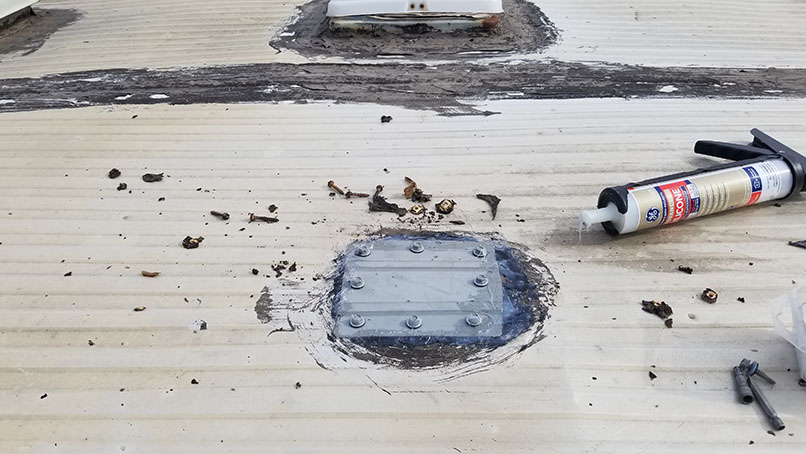
Patched the holes
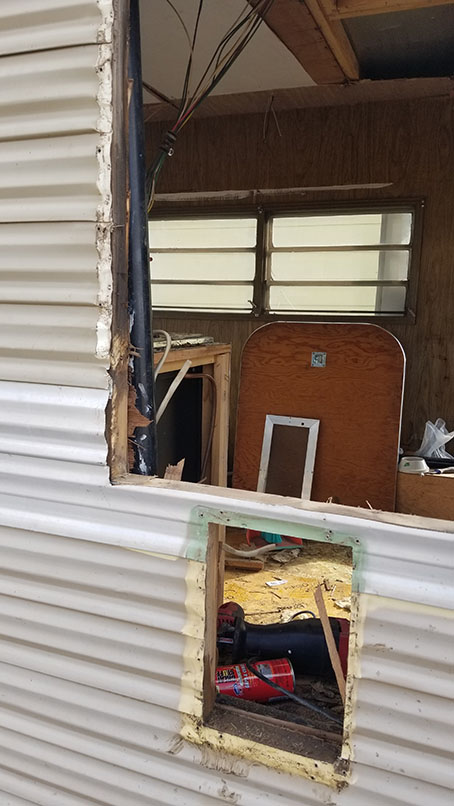
The refrigerator had a vent in the wall that was no longer needed (or wanted, as it would let water and bugs in), so I took it out completely and made the hole bigger
And added another window in its place. Surprisingly, it doesn't leak at all
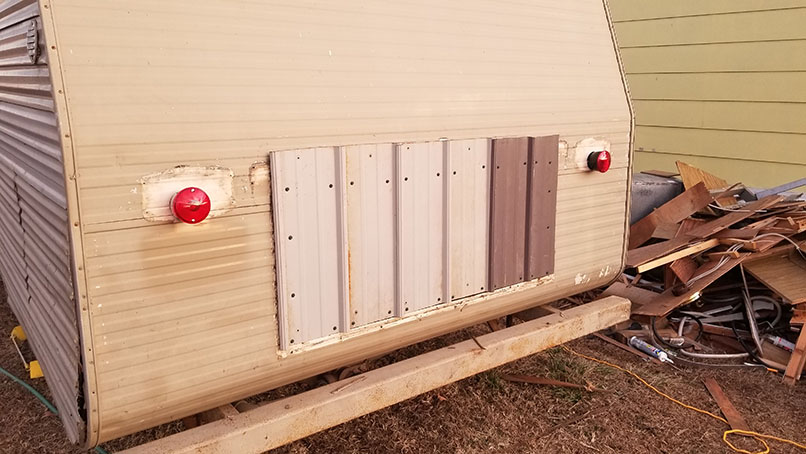
Replaced the hatch door with some old roofing metal I had laying around. Not a fan of how it came out, but it works better than what was there before.
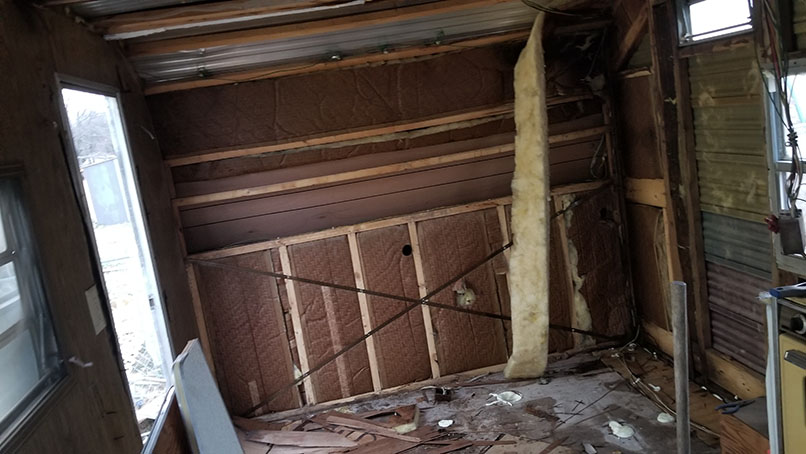
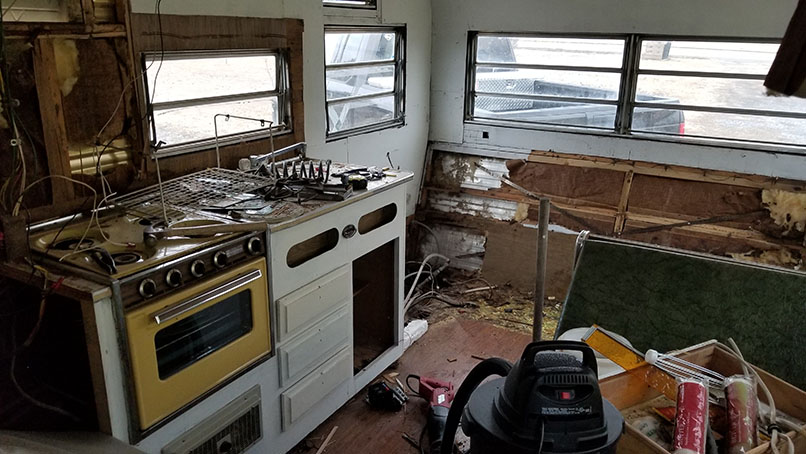
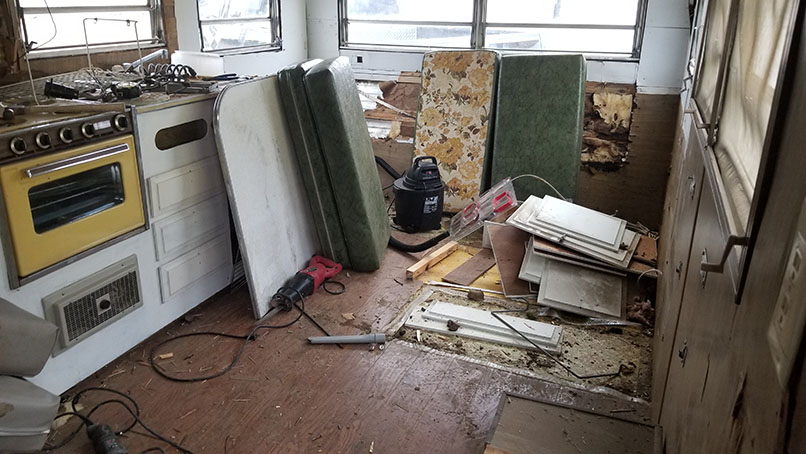
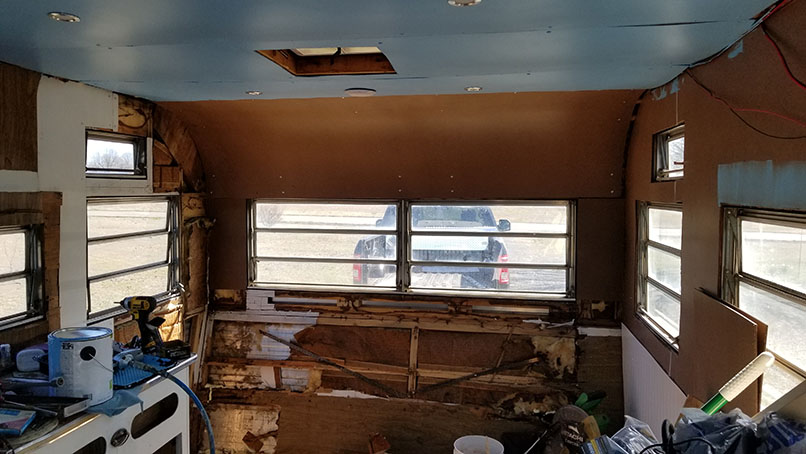
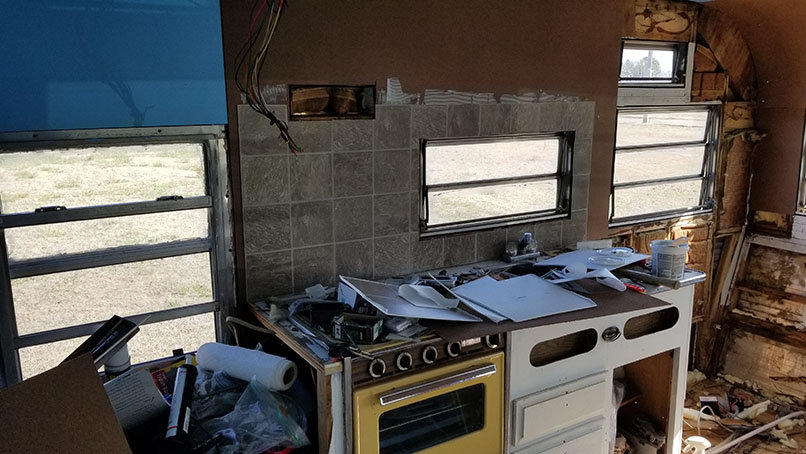
Finished ripping out the rest of the original walls and cabinets.
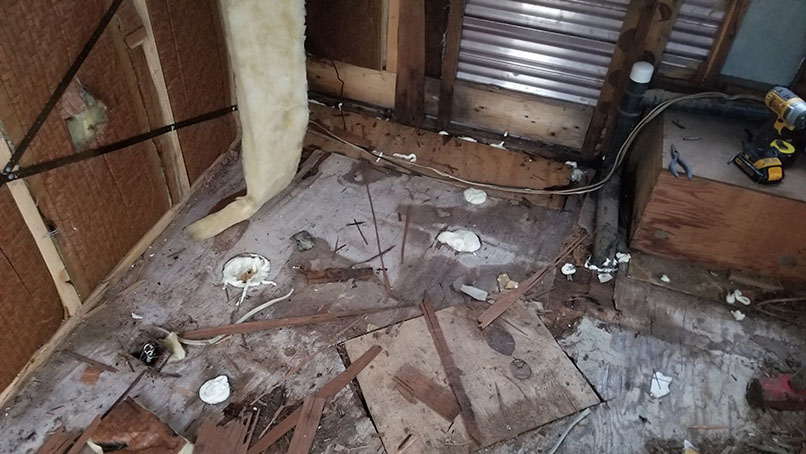
Aw jeez, now I see some floor rot. The bathroom that was here originally must've leaked quite a bit, since the floor was very soft in places, and was rotted around the drain pipes.
I cleaned it up real well, sprayed some bleach water on it to kill any possible mold, and laid new 3/4 OSB on top of it.
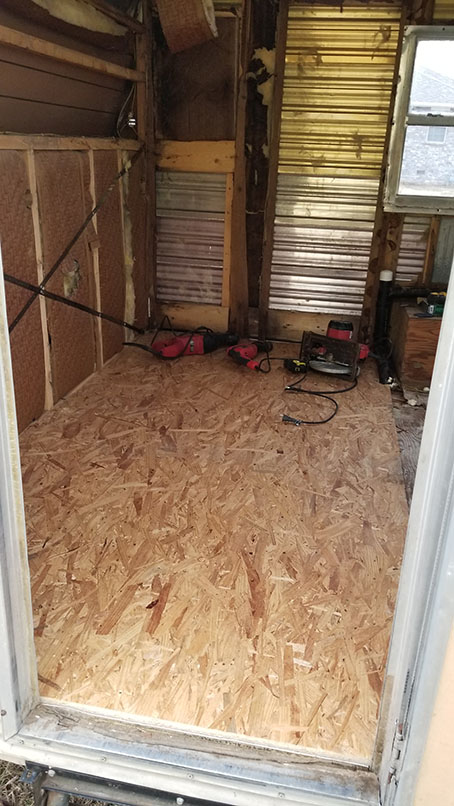
And took the new flooring across the whole interior.
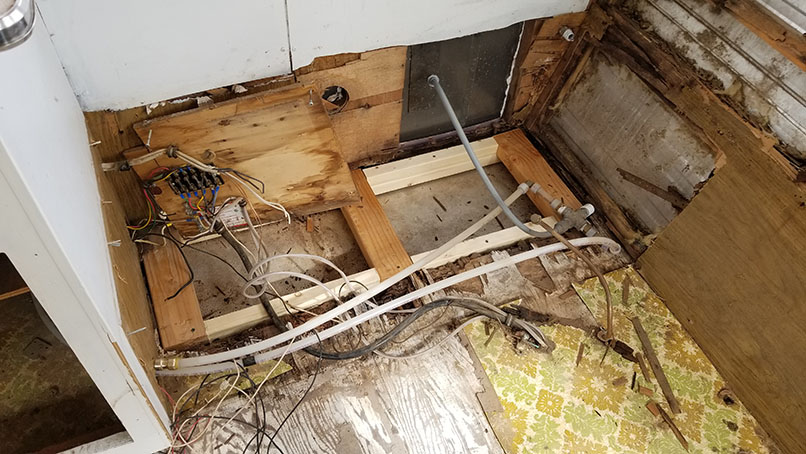
Found some more floor rot where the original water heater and pump were, so I cleaned that up, reinforced it, and laid more new flooring down.
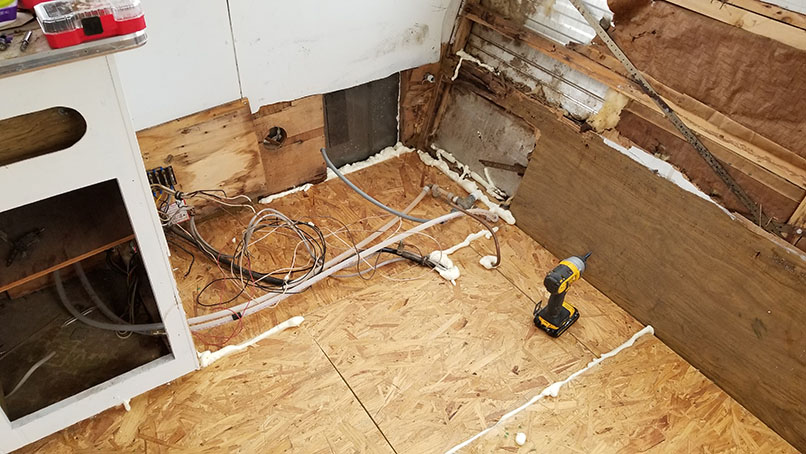
Got it secured and added some expanding foam caulk to seal the joints up.
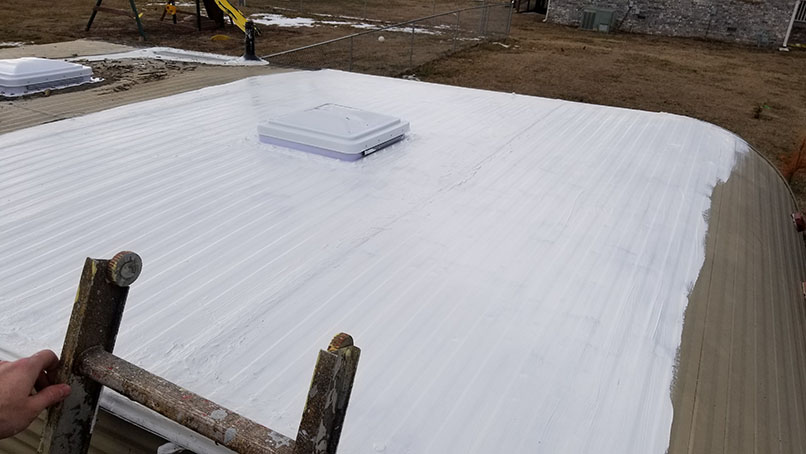
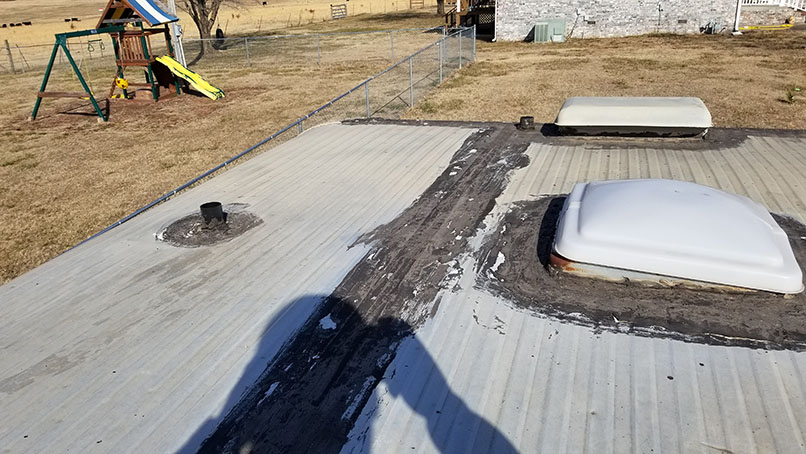
Now for the roof; there were some little leaks here and there, so I got some elastomeric paint to put on it, and that seems to have done the trick. No more leaks in the roof.
Also remade the hatch door, looks way better now.

Had the bright idea to mount the solar panels on the roof, which turned out to be a bad idea, as it created new leaks. I ended up taking them back down in the end, and stashing them in the hatch when not in use.

Here's the batter where the solar panels connect, it runs everything electric now. The lights, the fans, the stereo, and the water pump, plus anything else that can run off of USB plugs or a cigarette lighter plug.

Got my wiring ran for the recessed lights, stereo speakers, and roof vent fans.
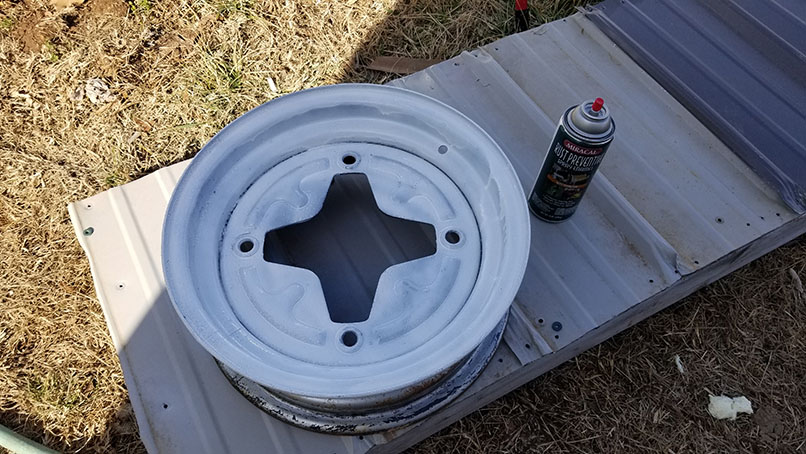
Figured it was important to have a spare tire, so I had to look far and wide for this specialty rim. Had to order it off ebay from a guy in Canada.

Got a tire on it, and mounted it to the tongue/hitch area.
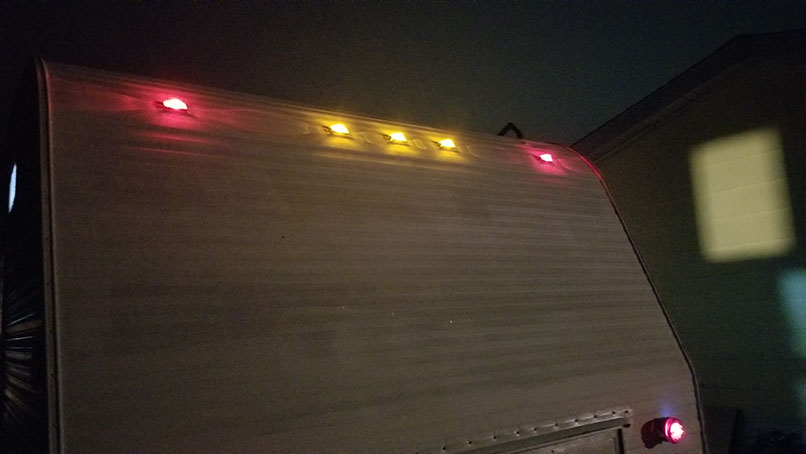
Replaced all the roof lights with brighter and more efficient LED lights, and also rigged them up to run either off the trailer hookup to the truck, or from the battery in the camper, so we could still turn them on even if the truck was disconnected.
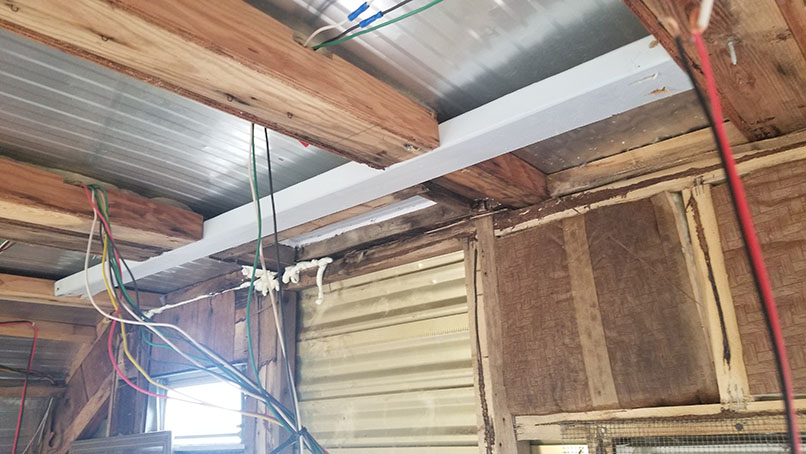
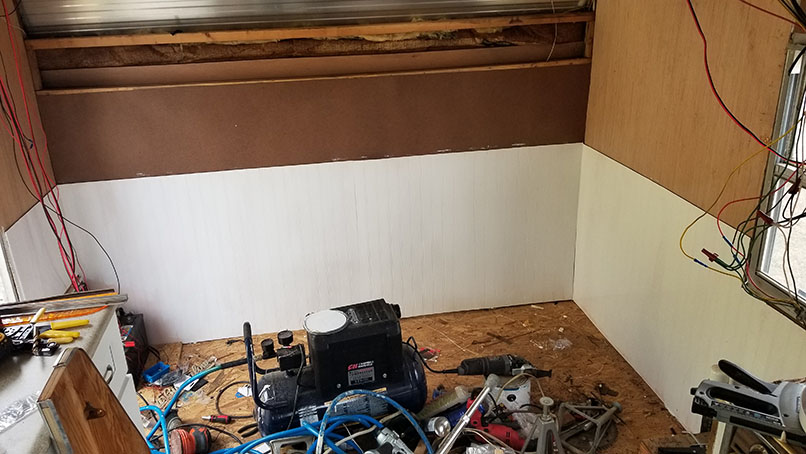
Had some rot in the roof as well; those vent pipes weren't sealed very well either. So I had to reinforce the framing some.
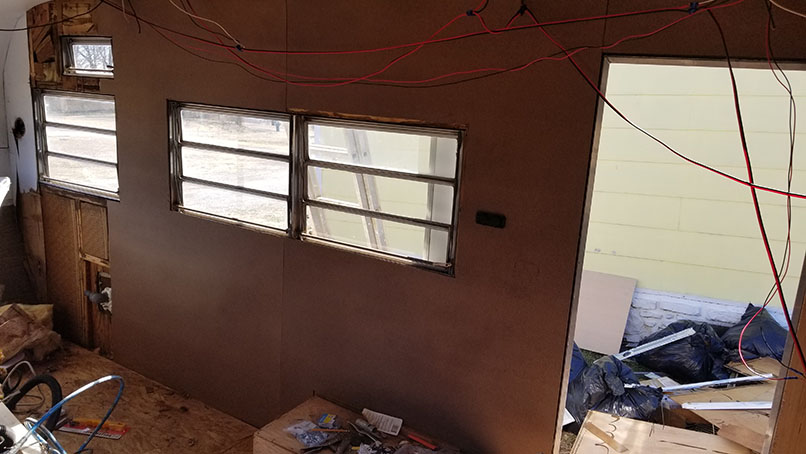
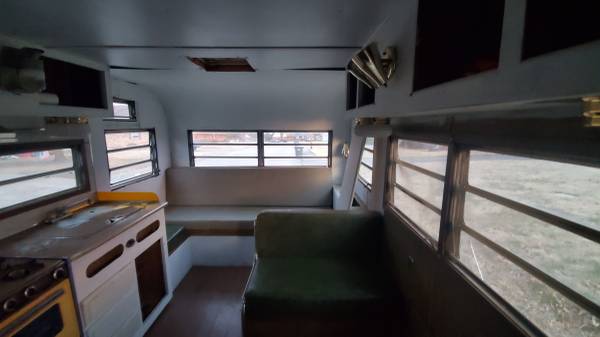
Getting some wall paneling on, starting to finally take shape.
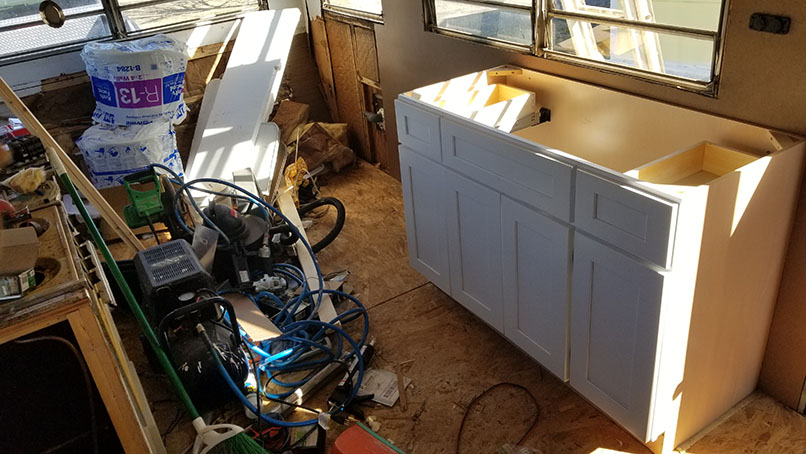
Put in a cabinet where the old dining booth was. I had to cut the bottom to fit around the wheel well.
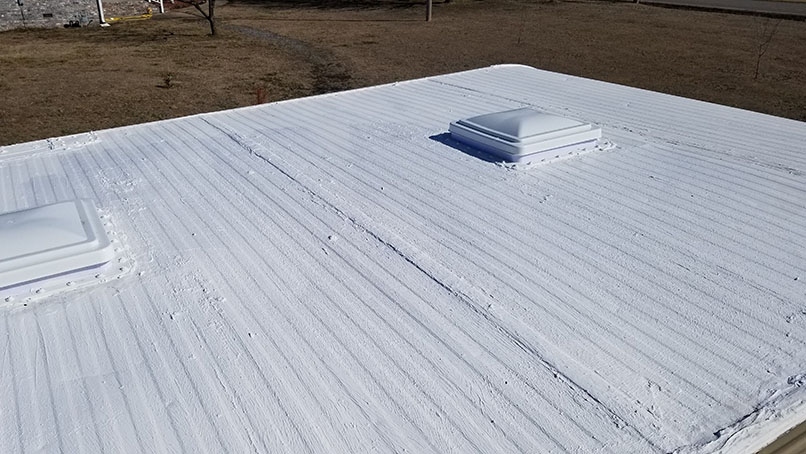
Got the roof finished and painted, and sealed the leaks that the solar panel mounts had created. Also put in brand new vents that had electric fans in them as well.
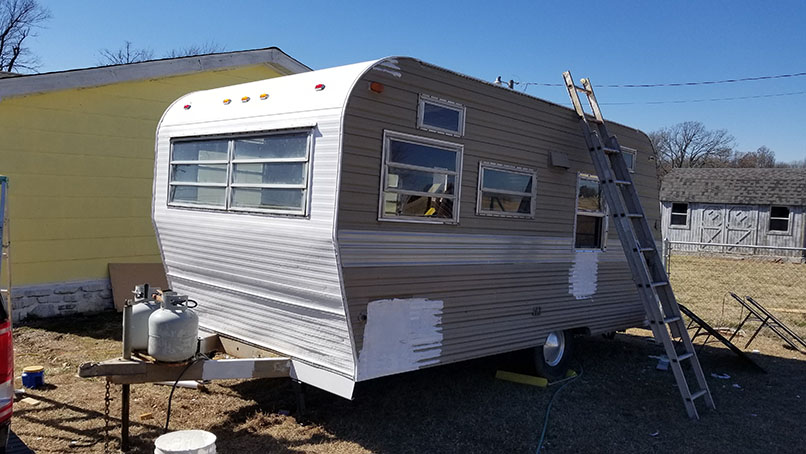
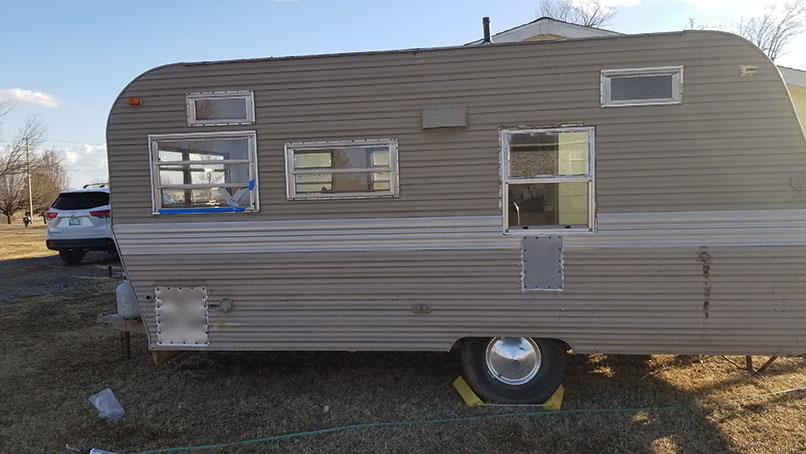
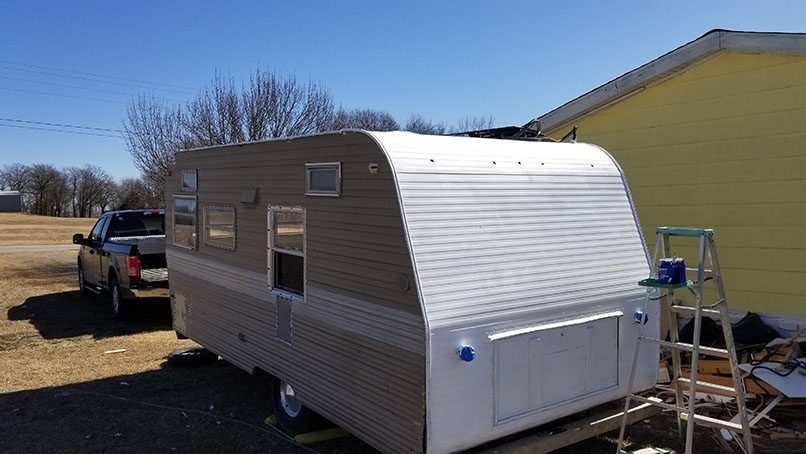
Started painting the sides now, I used the elastomeric paint on the places I had patched just to help seal them up better.

I wanted to try and save some money, so I started using some of the yellow paint I had painted my house with a while back. It was old and clumpy from having sat through a couple of winters outside.
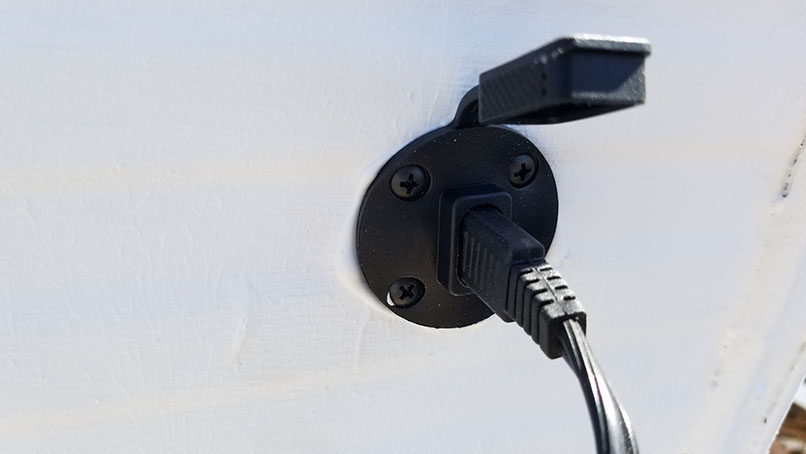
Took a break from the painting to install a solar panel plug on the back, so now the panels can just sit out on the ground and still plug in and keep the battery charged.
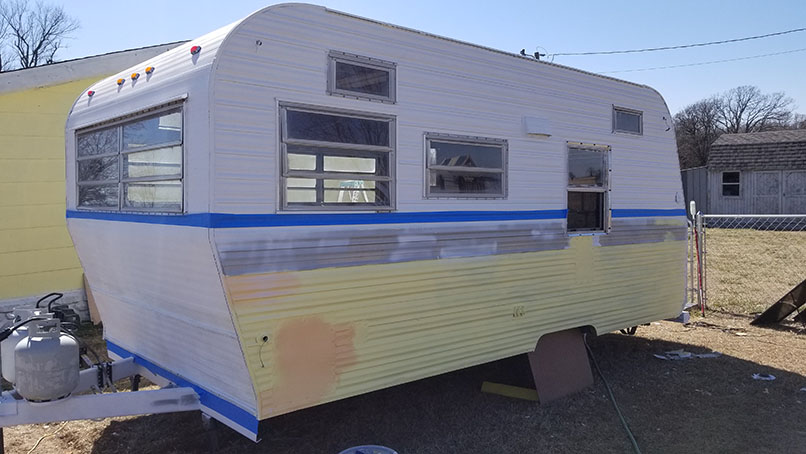
Decided the yellow was a little too pale, so I tried mixing some orange with it in an attempt to darken it up some. All it did was make it a peachy color, yuck.
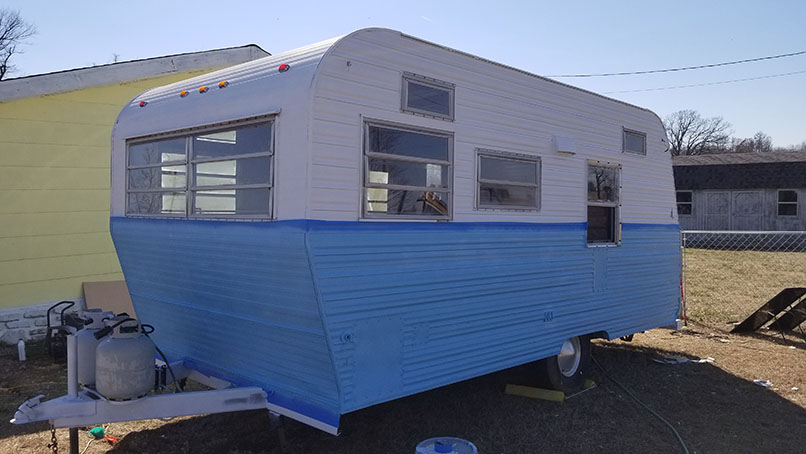
So I went in a totally different direction, and decided to make it similar to an old Volkswagen van, with a blue and white scheme. I like this much better.
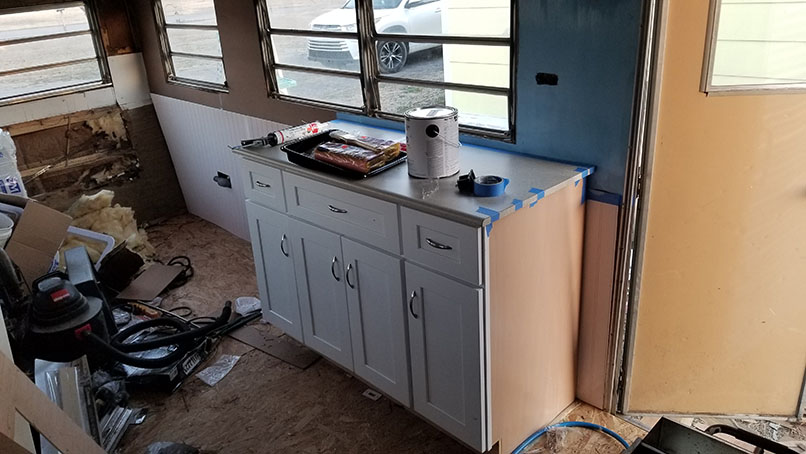
Got the countertop on the new counter.
And some wainscoting on the walls to make it look fancy

Removed those pesky vent pipes that were unnecessary now that the toilet and shower were gone
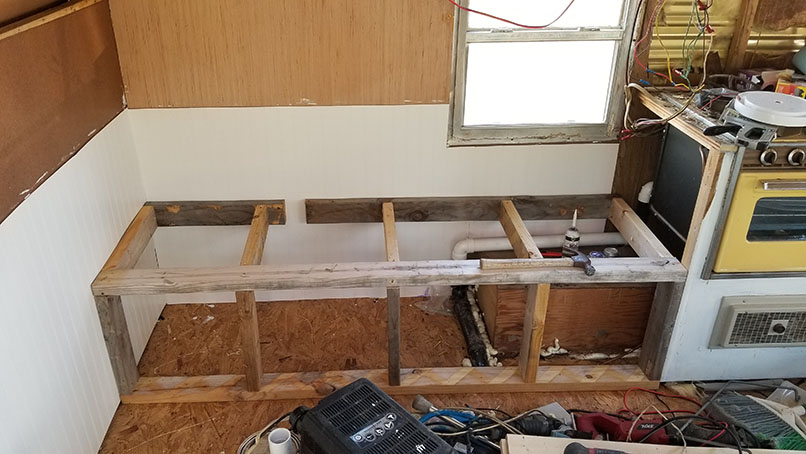
Now for the new dining area. Put in a bench over the wheel well and drain pipes
And another small bench on the other side, both open up and have storage

Painting the walls and ceiling a similar blue to the exterior
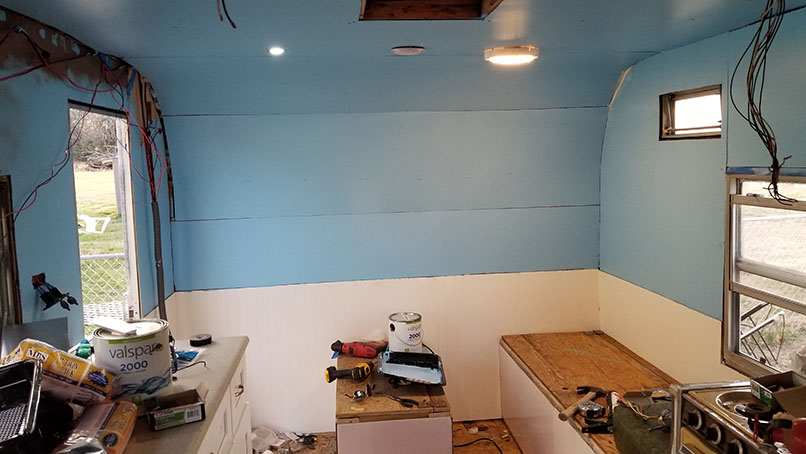
Got some more paneling up on the ceiling, and the first row of lights and a speaker installed.
Bending paneling is a pain in the butt. Also, if the panels look like they're drooping or bulging in the middle, it's because of the insulation underneath them. It's supposed to go into 2x4 walls, but these walls are 2x2, so it's a little thicker than it should be.
Vinyl tile backsplash
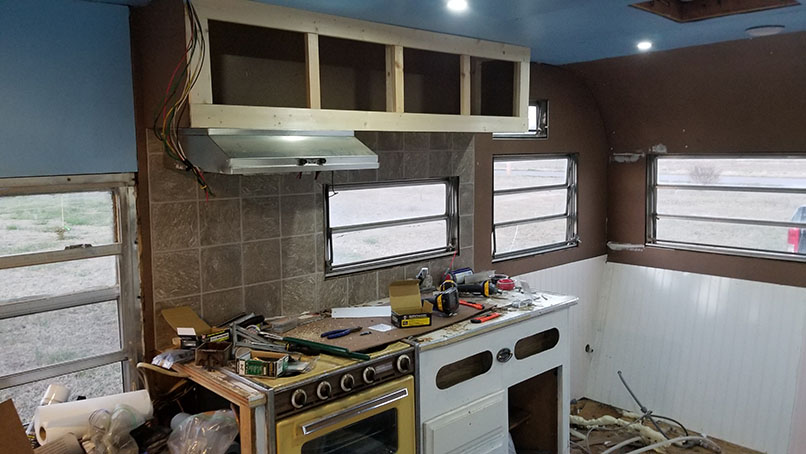
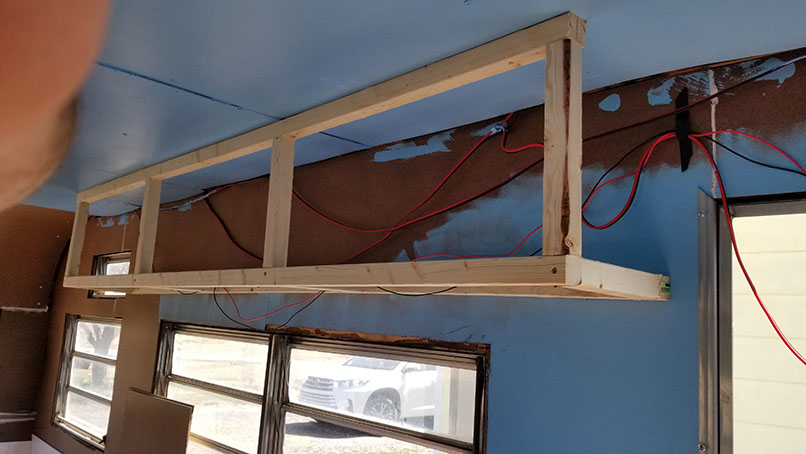
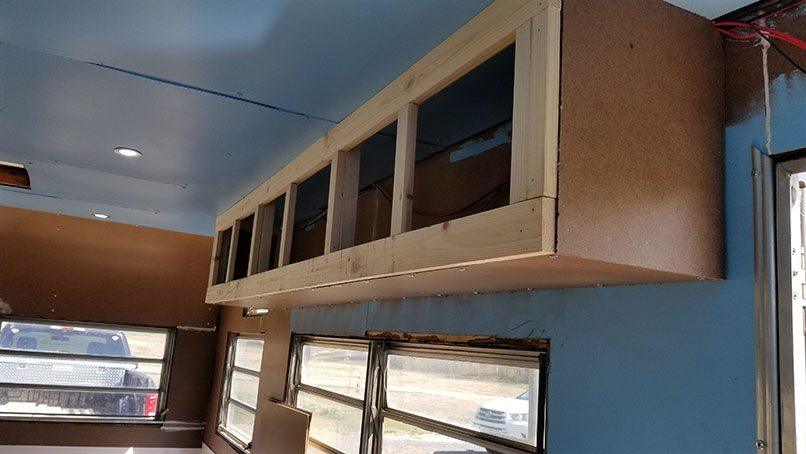
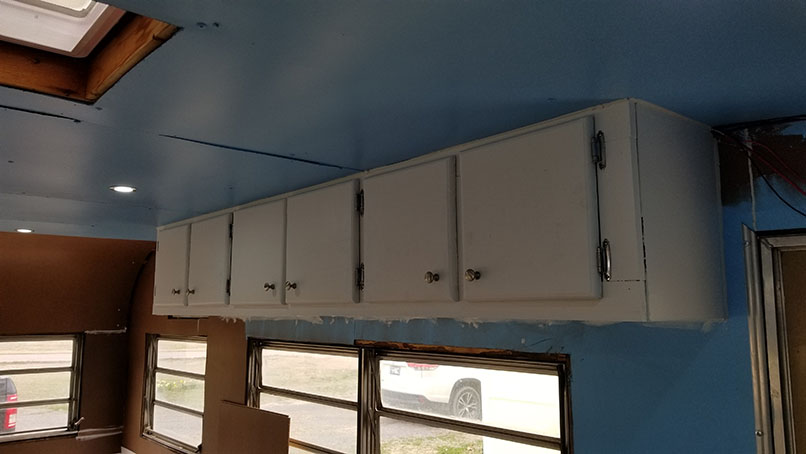
Built some cabinets and attached the original vent hood
Put some cabinets on the other side too, over the new cabinet
Used some leftover paneling to finish out the sides and bottom
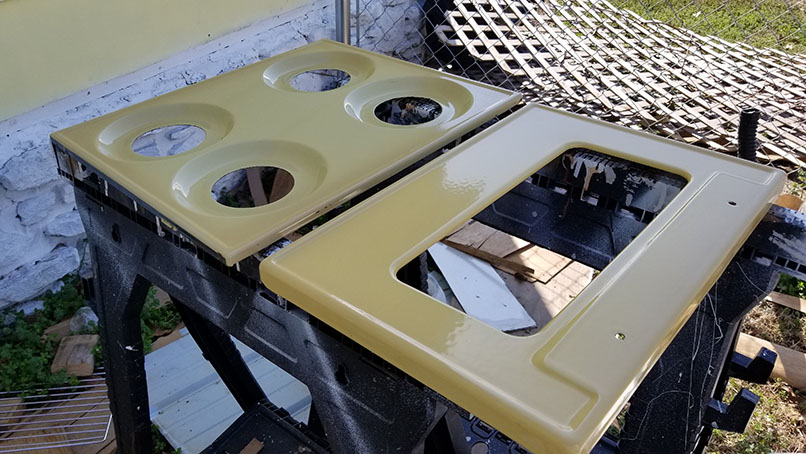
And now for the stove color...
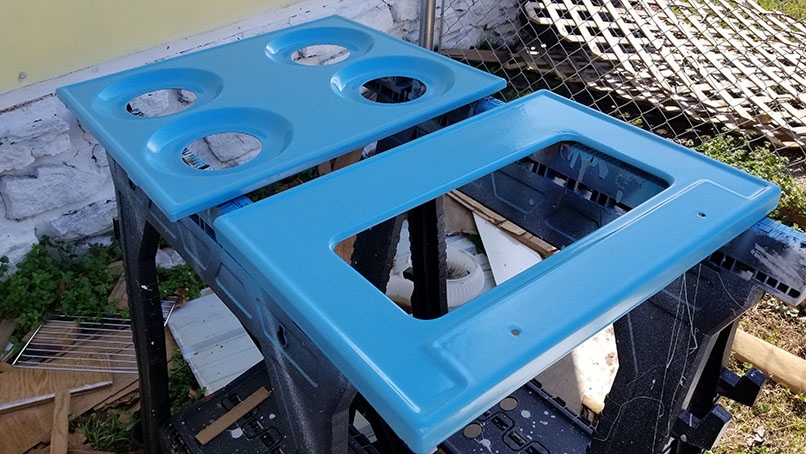
Instead of the "Harvest Gold" color from 1972, I opted to make it a pretty blue

Stove panels put back on, looks nice
Made some doors for the new cabinets, and put them on there with shiny hinges and knobs
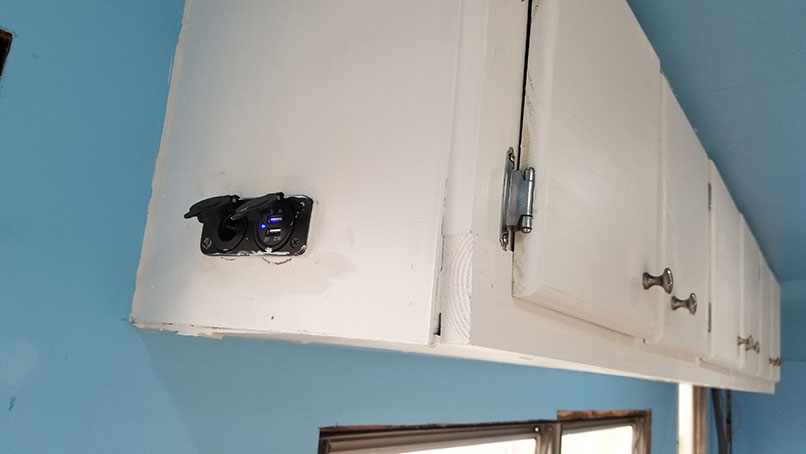
Put in an outlet for USB devices or cigarette lighter plugs
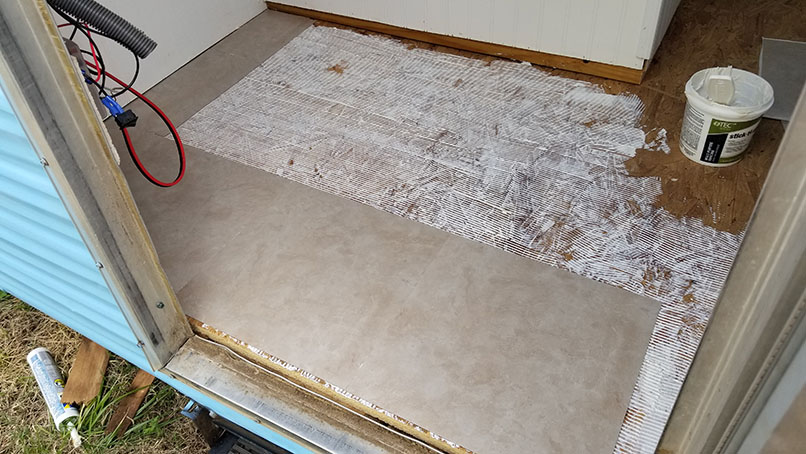
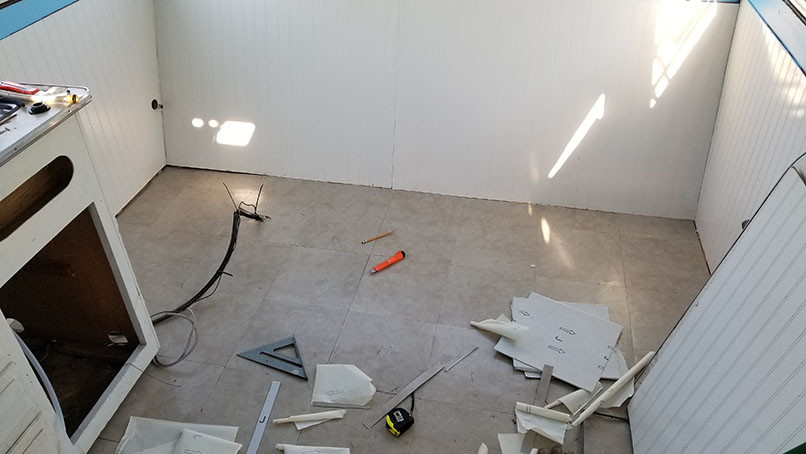
Getting started on the floor. Figured some vinyl tile might help prevent new water damage if we spill something, or get a leak somewhere
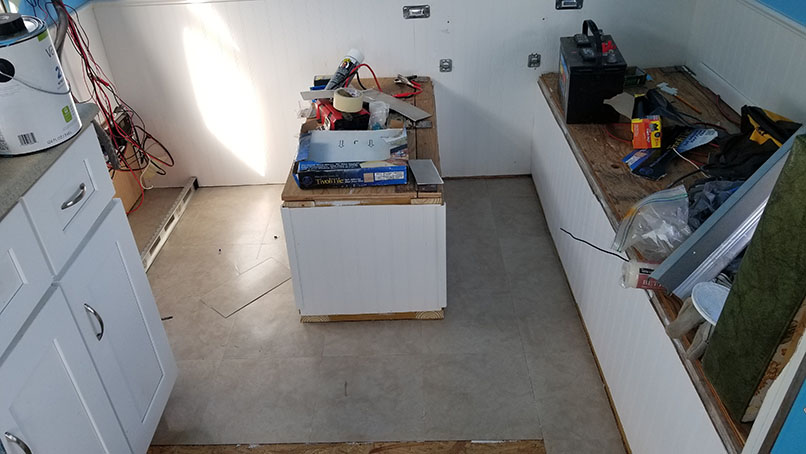
Tedious process of laying floor tile, yeesh
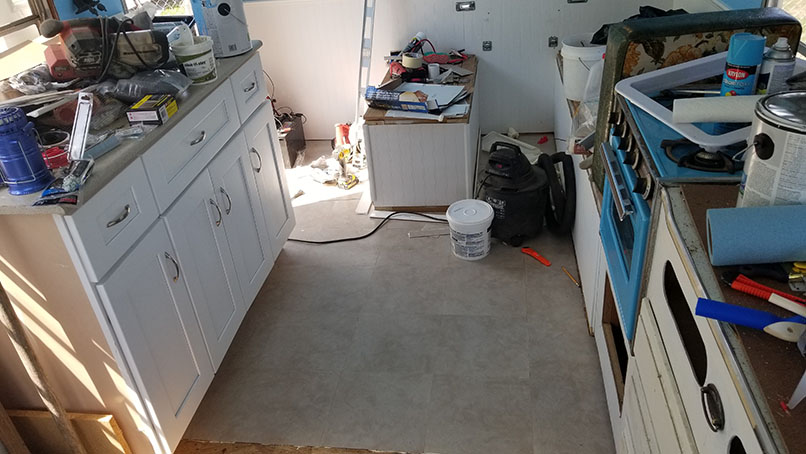
Progress was slow but sure
Got it done with minimal damage to my jeans. I can never remember to change into work clothes before working on messy stuff.
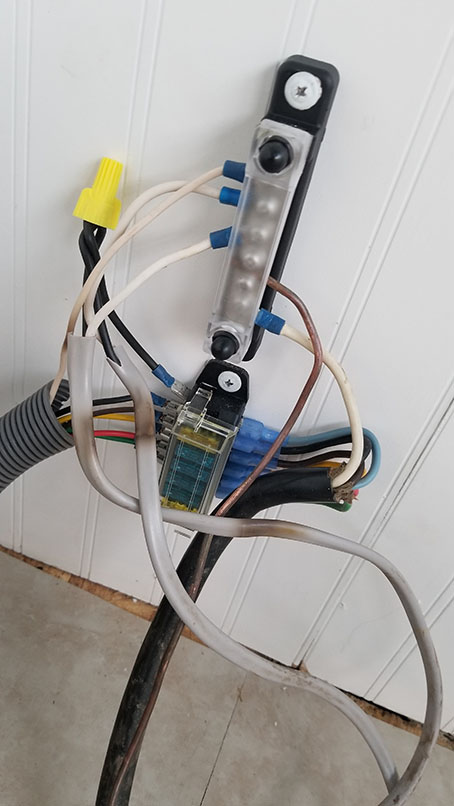
New fuse bank for the incoming power from the truck; the old system used ancient tube fuses. These will be easier to replace if need be.

Coming along nicely, nearly ready to install the bunk beds
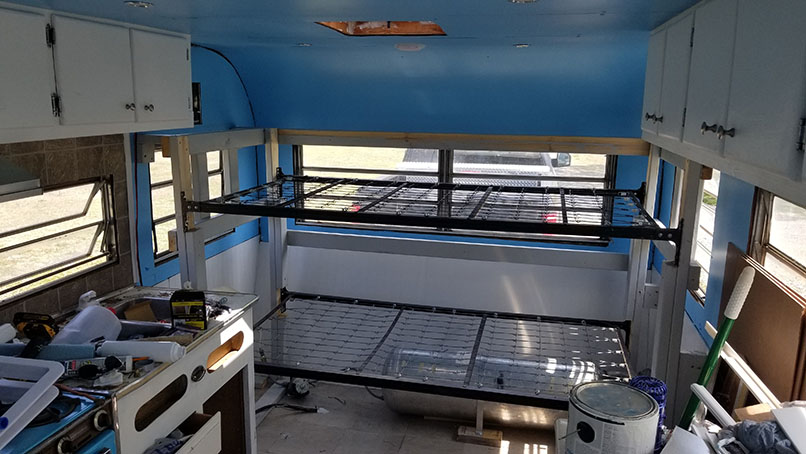
Found some Army bunk bed frames at my local Habitat for Humanity store and built them up with some 2x4 framing
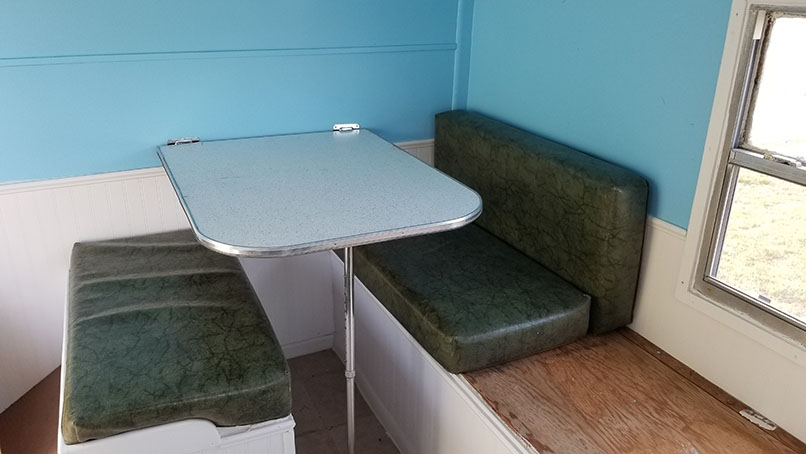
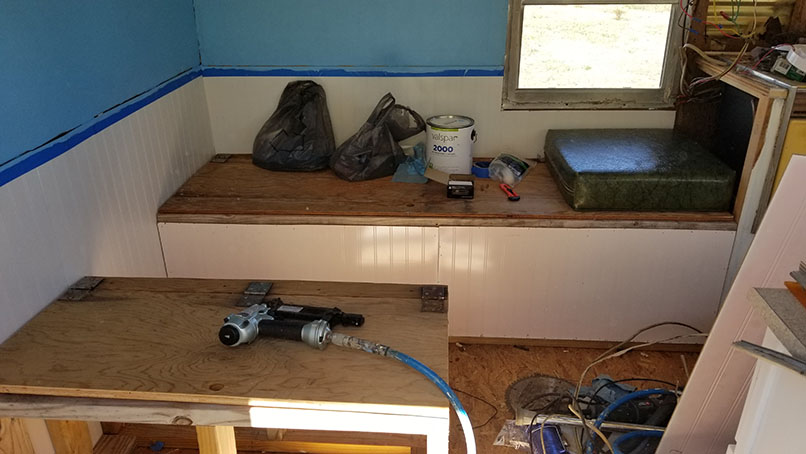
Got the cushions on the bench for the dining area
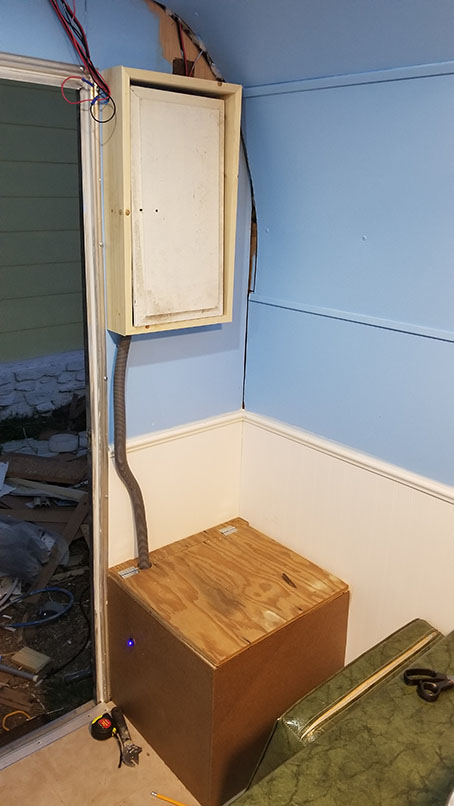
Built a box around the battery and fuse panel, the top opens up

Painted the box and installed some switches for the lights and such, and made use of my fancy new label maker
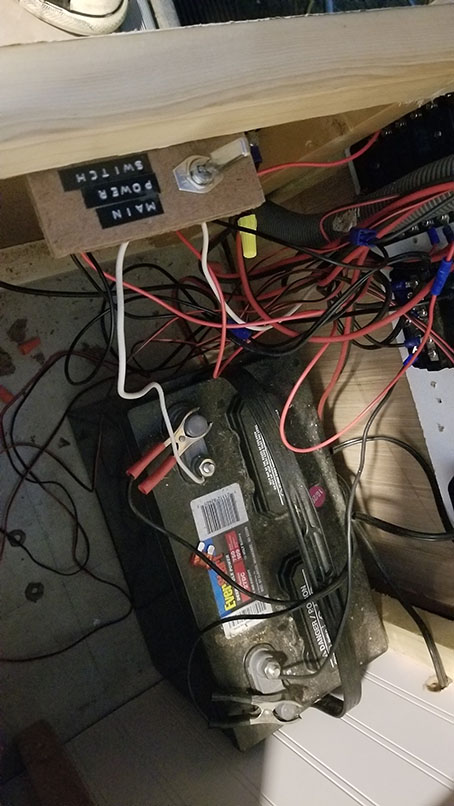
As you can see, the wires were kind of a jumbled mess, so now that's out of sight in the box.

Added a cabinet above the box to help hide the wires, and also to work as a medicine cabinet. I had a small cushion from the original camper layout, so I used it to make the box a small seat too.
.jpg)
Added another cushion to the window seat area; I had to cut down one of the original seats that had gone across the front of the camper on a pull-out bed
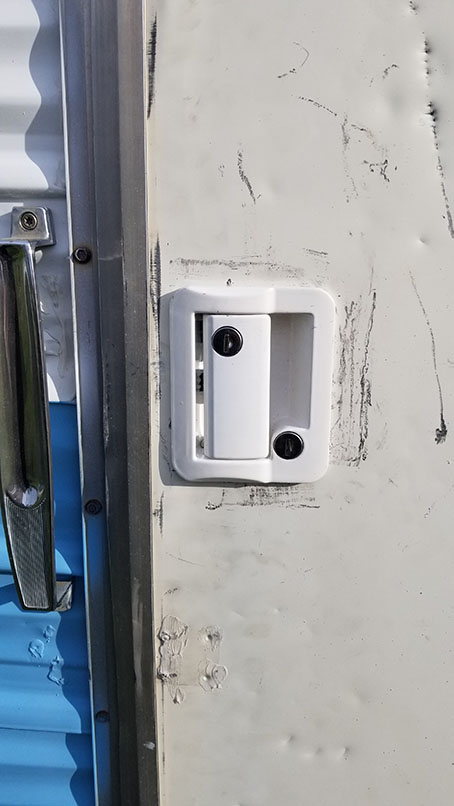
A regular doorknob wouldn't work with a screen door, so I ordered a latch handle off of ebay and installed it
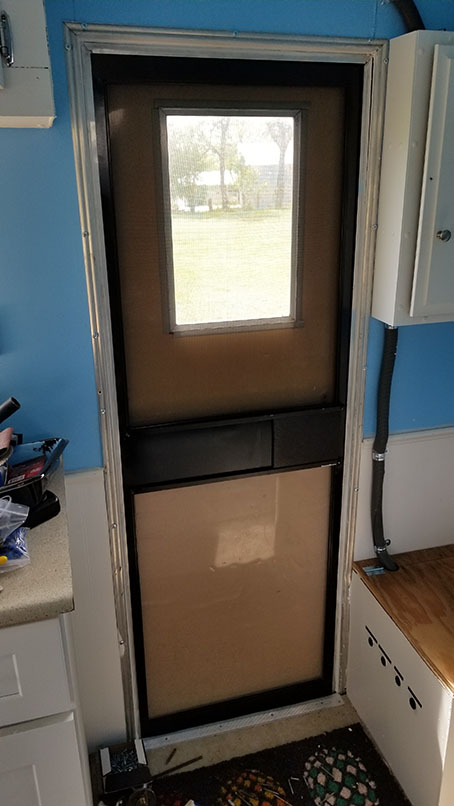
and also built a screen door, since a new one costs like $400 or something. This one also came from my local Habitat Store as a sliding glass door screen; I disassembled it and cut it down to fit, and also put in the middle push panel/slide thing so the outer door handle could still be reached through it.
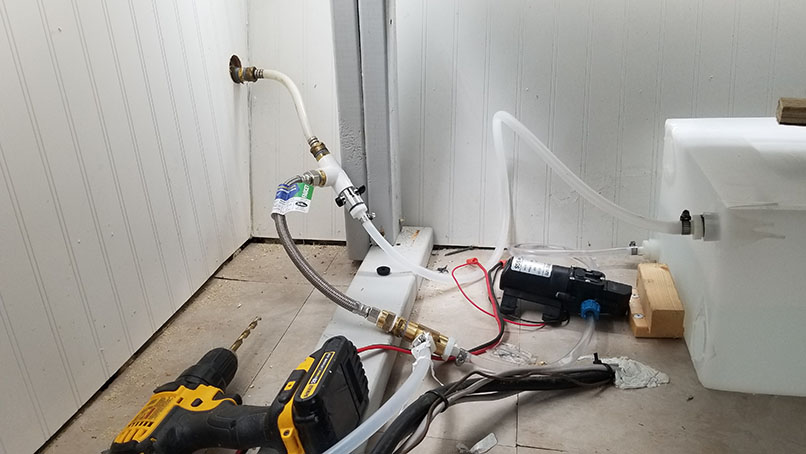
Was going to re-use the original water holding tank, but figured that since it was nearly 50 years old, I might out to get a fresh clean one. So I got this new plastic one, which is good because it also allows me to see how much water is in it without needing a gauge or meter or anything.
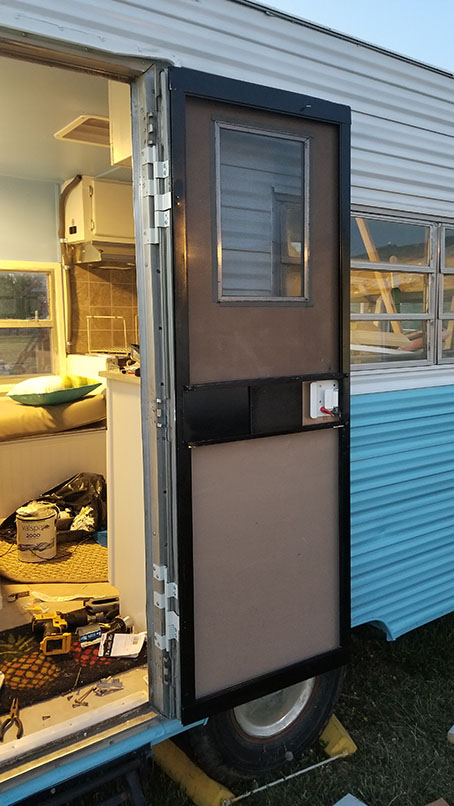
Got some fancy new hinges off Amazon that allows the screen door to open with the outer door
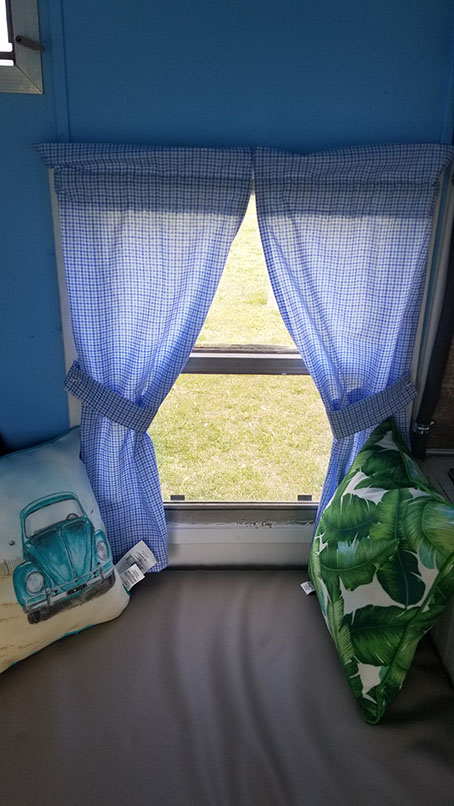
Got some fabric from Walmart and sewed up some curtains. Tedious, tedious work.
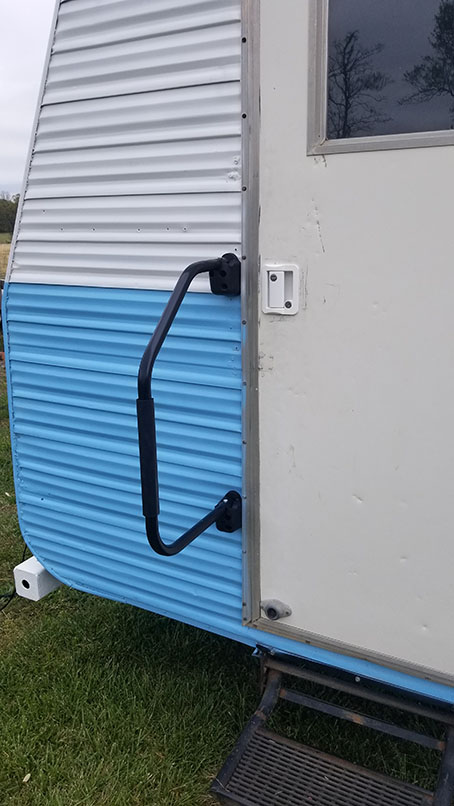
Put in a handrail to assist those smaller than me up the steep steps and into the camper
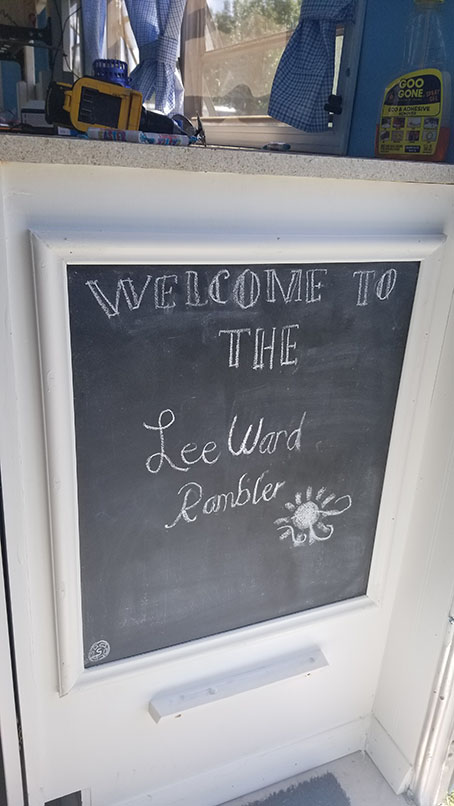
Used some leftover paneling to create a little chalk board; I figured it would be handy for keeping score if we're playing board/card games and won't have to worry about finding pencil and paper. My oldest daughter drew the imagery; the unofficial name of the camper is "The Leeward Rambler" which is a combination of my last name, my wife's maiden name, and the older two kids' (stepkids) last name.

For anyone who's a fan of the old TV show "LOST", I added a few stickers and such to sort of theme it out a bit
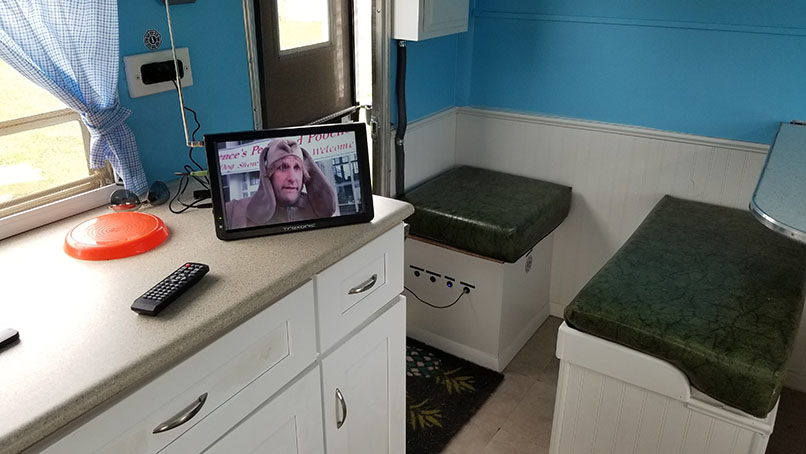
Got me a 12 volt TV for the times when we really want to rough it, but not TOO rough. Plus, it'll help keep the babies quiet if we throw some Sesame Street on there.
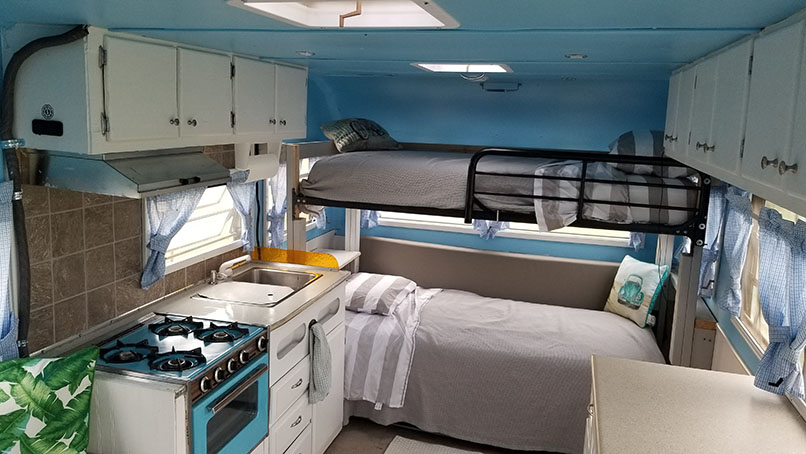
Got the beds all made up and ready to sleep in
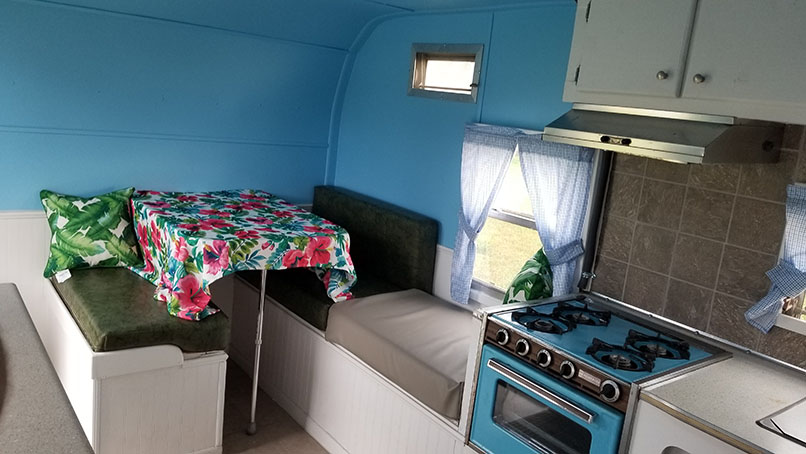
Tablecloth on the table, ready to eat on
The finished camper